Coding and Hosting a Telegram Bot with Python 🐍
I spent a few weeks creating a Telegram bot for a very dear friend. Until now, he had been performing the redundant task of posting content on social media using the same template created with Canva. While Canva is very accessible, it still involves redundant steps that can be easily avoided. With chatbots and Telegram making headlines recently, I thought it was a good idea to launch my own chatbot. Here’s how I did it.

"Octobot" banner generated by Flux on Perplexity
Prerequisites
Before starting, make sure you have the right development tools:
- Python and Docker installed
- An Azure account
- A Telegram account
Creating the Telegram Bot
To start on the Telegram side, you’ll need an API key. It’s simple and free
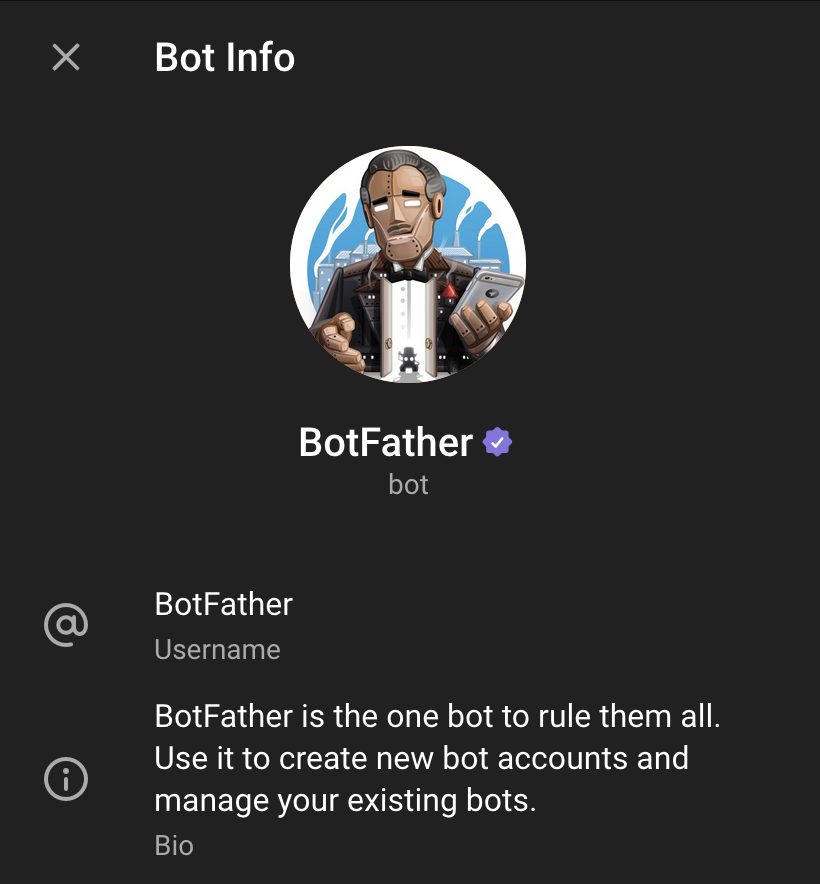
- Open Telegram and search for “BotFather”
- Send the
/newbotcommand and follow the instructions - Note the API token (it remains in the conversation if you forget it)

BotFather
Developing the Bot in Python
Create a new file my_bot.py.
For the base, you need at least this:
import os
import telebot
import threading

TOKEN = os.environ.get('TELEGRAM_TOKEN')
bot = telebot.TeleBot(TOKEN, parse_mode=None)

# Choose commands to start with. Here /start and /help
@bot.message_handler(commands=['start', 'help'])
def send_welcome(message):
    chat_id = message.chat.id
    bot.reply_to(message, f"Hello there 🐍 Your chat.id is { chat_id }")

# Handle other messages
@bot.message_handler(func=lambda message: True)
def handle_message(message):
    if message.content_type == 'text':
        bot.reply_to(message.text, f"Your message reversed: { message[::-1] }")
    elif message.content_type == 'photo':
        bot.reply_to(message, "Nice photo")
        with open('path/to/shrek.png', 'rb') as photo:
            bot.send_photo(message, photo)

# To keep the container running
def heartbeat():
    while True:
        logging.info("Ping")
        time.sleep(600)

def main():
    threading.Thread(target=heartbeat, daemon=True).start()

    while True:
    try:
        bot.polling(none_stop=True, interval=0, timeout=300)
    except Exception as e:
        # If no response from Telegram server
        time.sleep(15)

if __name__ == '__main__':
    main()
Now, we need to make sure the libraries are downloadable by the Docker container. Create a requirements.txt file with this line:
pyTelegramBotAPI==4.20.0
Dockerizing the Bot
Here we’re using environment variables. For testing, it’s better to do it directly with Docker locally.
Create a Dockerfile:
FROM python:3.9-slim

WORKDIR /app

COPY requirements.txt requirements.txt
RUN pip install --no-cache-dir -r requirements.txt

COPY . .

CMD ["python", "my_bot.py"]
And to test, run this command (replace the placeholder with the correct bot token):
docker build -t my_python_bot . && docker run -d --name my_python_bot -e TELEGRAM_BOT_TOKEN="1234567890:AABBCCDDEEFF-gghhiijjkkllmmnnoo123" my_python_bot
Now, search for your bot’s name, the one you entered with BotFather. Send it a message and see for yourself!
CI/CD to Build the Image and Push to GitHub Container Registry
You’ll need to build the image and host it on a container registry. I’m choosing GHCR, GitHub’s registry, because I’m familiar with it.
I’ll also use GitHub Actions CI/CD to launch this. In the .github/workflows/build.yml file, you’ll need at least these steps:
name: Build and Push Container Image

on:
  push:
    branches: [ 'master', 'main' ]
  workflow_dispatch:

permissions:
  contents: read
  packages: write

jobs:
  build-and-push:
    runs-on: ubuntu-latest

    steps:
    - name: Checkout code
      uses: actions/checkout@v4
      with:
        submodules: 'true'

    - name: Set up Docker Buildx
      uses: docker/setup-buildx-action@v3.6.1

    - name: Login to GitHub Container Registry
      uses: docker/login-action@v3.3.0
      with:
        registry: ghcr.io
        username: ${{ github.actor }}
        password: ${{ github.token }}

    - name: Get repository name in lowercase
      run: echo "REPO=${GITHUB_REPOSITORY,,}" >>${GITHUB_ENV}

    - name: Build and Push Image to GHCR
      uses: docker/build-push-action@v6.5.0
      with:
        context: .
        push: true
        tags: |
          ghcr.io/${{ github.repository }}:latest
          ghcr.io/${{ github.repository }}:${{ github.sha }}
Then, on GitHub (assuming you’ve put the files in a GitHub repository), you’ll see that when you push your commit, the build will automatically start.
Deployment on a VM
For my part, I managed to deploy it on the PaaS service Azure Web Services, but I ultimately preferred to put Docker in a VM. I did this to have control over Docker execution. Here’s how I did it:
- Create an Azure virtual machine, for me with Rocky Linux 9.2 as the OS and Standard B2s as the SKU (€33/month today in the France Central region)
- SSH into the VM to install Podman or Docker (Podman for me, because it’s open-source and we love that)
sudo dnf update -y sudo dnf install podman -y podman --version sudo systemctl enable podman sudo systemctl start podman - Launch the container to run indefinitely
# Login to the registry if your GHCR repository is private echo "ghp_personal_access_token_to_generate" | podman login ghcr.io -u my_user --password-stdin # Launch the container that will restart in case of problems podman run -d --replace --restart unless-stopped --name my_telegram_bot -e TELEGRAM_BOT_TOKEN="1234567890:AABBCCDDEEFF-gghhiijjkkllmmnnoo123" ghcr.io/my_user/my_telegram_bot:latest - (If the container stops on its own) Add the container to
systemd:podman generate systemd --new --files --name my_telegram_bot.service
Conclusion
As far as development goes, a Telegram bot doesn’t require a lot of skills. Using Python and Telebot is certainly the simplest method to achieve this, and I love simplicity.
There are many costly ways to host a Telegram bot. I didn’t choose the most economical way, but it allowed me to learn quite a few things.
Keep in mind that it’s not possible to host two instances of Telegram bots in parallel, so no acceptable redundancy, unfortunately.
Lazily translated from French using Claude 3.5 Sonnet with Perplexity
If you have any questions or suggestions, feel free to contact me by email, on LinkedIn or directly by sending an issue on GitHub
